Winter Memories Screenshots

Winter Memories review
A practical, player-first walkthrough and analysis of Winter Memories
Winter Memories is a narrative-driven adult-oriented game that blends character routes, progression systems, and collectible mechanics to deliver a replayable experience. This article dives into core systems, character routes, unlockables, and practical strategies to make your playthrough smoother and more rewarding. Whether you’re starting your first run or aiming for full completion, I’ll share hands-on tips, personal anecdotes from multiple play sessions, and clear step-by-step advice to help you get the most from Winter Memories.
Getting Started: Installation, Settings, and First Run
So, you’ve just picked up Winter Memories and you’re staring at that shimmering ‘Install’ button, that mix of excitement and “please don’t crash on launch” anxiety bubbling up. I’ve been there! 🎮 The first steps into a new visual novel world are magical, but a bumpy setup or a missed early clue can really put a damper on the mood. This guide is here to make sure your journey into this snowy, character-rich story begins as smoothly as possible. We’ll walk through everything from the technical nitty-gritty of Winter Memories installation to exactly what you should do in your crucial first hour to set yourself up for success. Think of this as your friendly, spoiler-free co-pilot for getting started.
Let’s get your game running perfectly and make those initial choices count! ❄️
System requirements and installation tips
Before we get lost in the story, we need a solid foundation. The good news is that Winter Memories isn’t a graphically brutal title, but paying attention to the Winter Memories system requirements will ensure the experience is buttery smooth, letting you focus on the characters and choices, not stuttering frames.
You can officially grab the game on a couple of major storefronts. I always recommend buying directly from these to ensure you get automatic updates and official support. The primary platforms are:
* Steam: The most common home for visual novels like this. Cloud saves are a huge plus if you play on multiple devices.
* itch.io: A fantastic platform for indie gems. Sometimes developers offer additional goodies or earlier builds here.
Now, let’s talk specs. The developer lists minimum requirements, but I’m going to give you my recommended specs for an ideal experience—especially if you want to have other apps open, like a guide or a music player, without a hiccup.
Pro Tip: If your system is borderline, always ensure your graphics drivers are up to date. An outdated driver is the culprit behind more mysterious launch issues than I can count!
For a truly seamless Winter Memories installation, follow these steps:
1. Check your disk space: Ensure you have at least 2-3 GB free beyond the listed game size. This gives the installation room to breathe and unpack files properly.
2. Install on an SSD if possible: This dramatically reduces loading times between scenes and saves. If you only have a hard drive, it’s fine, but be prepared for slightly longer transitions.
3. Allow the installation to complete fully: Don’t interrupt the process or put your PC to sleep. It might look finished before it actually is, particularly during the “finalizing” stage.
4. Post-installation: On Steam, the client might install necessary redistributables like DirectX or Visual C++. Let it do its thing! This is a common pitfall where players click away too quickly and then wonder why the game won’t launch.
A personal story from my first run: I was so eager to jump in that I installed the game on my nearly-full secondary HDD. The Winter Memories installation completed, but the game took ages to load every scene, which really killed the narrative momentum. After moving it to my primary SSD (a bit of a hassle, but worth it), it was like playing a different game—snappy and immersive. Lesson learned! 💾
Initial settings and accessibility options
Alright, the game is installed! Now, before you hit “New Game,” let’s spend five crucial minutes in the settings menu. This Winter Memories settings guide is all about tailoring the experience to your hardware and your personal comfort. Getting this right upfront prevents you from having to dig through menus later when you’re emotionally invested in a scene.
When you launch Winter Memories, you’ll likely be greeted by a launcher or a main menu. Head straight to “Config,” “Options,” or “Settings.” Here’s what you should focus on:
- Display & Resolution: Match this to your monitor’s native resolution for the sharpest image. If you’re on a laptop or lower-powered PC and experience slowdown, dropping the resolution one notch can be a great performance booster.
- Framerate: The game likely has a 60 FPS cap, which is perfect for a visual novel. If you have a high-refresh-rate monitor and see an “Uncap” option, you can try it, but it’s rarely necessary.
- Text Speed & Auto-Mode: This is critical! I recommend setting text speed to just a touch faster than default. You’ll be reading a lot, and a sluggish text crawl can become tedious. Also, configure the auto-advance speed to your reading pace if you plan to use that feature.
- Language: Double-check this is set correctly. Sometimes the initial install language can be quirky.
- Controller vs. Mouse/Keyboard: The game fully supports both. I prefer mouse for menu navigation, but a controller is wonderfully cozy for relaxed play. Pick what feels right for you.
Winter Memories accessibility features might be nestled within these menus. Look for options like:
* Text Size or Font Options: If you find the default text hard to read.
* Skip Options: Settings for skipping unread text or already-seen dialogue can be a blessing for repeat playthroughs.
* Audio Sliders: Separate controls for BGM, Voice, and SFX. Maybe you love the soundtrack but find certain sound effects a bit loud (I did!).
Below is a quick-reference table I wish I had on my first playthrough. It summarizes the key settings for a balanced start:
| Setting Category | Recommended Starting Point | Why It Matters |
|---|---|---|
| Resolution | Your monitor’s native resolution (e.g., 1920×1080) | Ensures perfect visual clarity without blurriness. |
| Framerate Cap | 60 FPS | Provides smooth animation and is the standard for the genre. |
| Text Speed | 70-80% of the slider | Makes dialogue feel responsive without rushing you. |
| Controller Support | On (if you have one connected) | Allows flexible playstyle; the game will prompt you based on input. |
| Save Frequency | Create a new save every 30 minutes / major choice | This is a player habit! It protects you from regrettable choices or bugs. |
A quick note on Winter Memories mods safety: The community for visual novels often creates mods, from translation tweaks to additional graphics options. If you explore this path, always download from trusted, well-known community hubs and read the comments thoroughly. Mods can sometimes conflict with game updates or, very rarely, contain undesirable elements. My golden rule? Complete your first, vanilla playthrough to experience the story as intended. Then, if you want to replay with mods, you’ll have a clean, official save to fall back on. Safety first! 🛡️
First hour checklist: what to focus on
You’ve conquered the tech, and the settings are tuned. Now for the fun part: actually playing! How to start Winter Memories isn’t just about clicking “New Game”; it’s about making those initial moments work for you. This first hour Winter Memories checklist is designed to prevent common beginner mistakes and unlock the game’s systems early, giving you maximum freedom and control over your route.
My biggest early blunder? I was so captivated by the introduction that I blew right past the in-game tutorial prompts about the Relationship Log and Skill Menu. I spent my first two hours just clicking through dialogue, wondering how I was supposed to influence the story. I had to reload my earliest save (luckily I made one!) and actually read the menus. Don’t be like past me! 😅
Here is your actionable plan for a powerful and informed start:
- Save Immediately, Save Often: Create your first manual save the moment you gain control. Name it “Day 1 Start” or similar. Then, get into the habit of saving in new slots at key decision points or at the start of each new in-game day. This habit is your single greatest tool for experiencing all the content the game offers.
- Explore Every Menu: Pause the story. Open your journal, your phone menu (if the game has one), the system menu, and the settings again from in-game. Understand what each icon represents—this is your command center for tracking goals, relationships, and your own stats.
- Don’t Skip the Tutorial Pop-ups: When a small window appears explaining a mechanic like “Gifting,” “Studying,” or “Part-Time Jobs,” read it carefully. These systems are your levers for affecting the world and character routes.
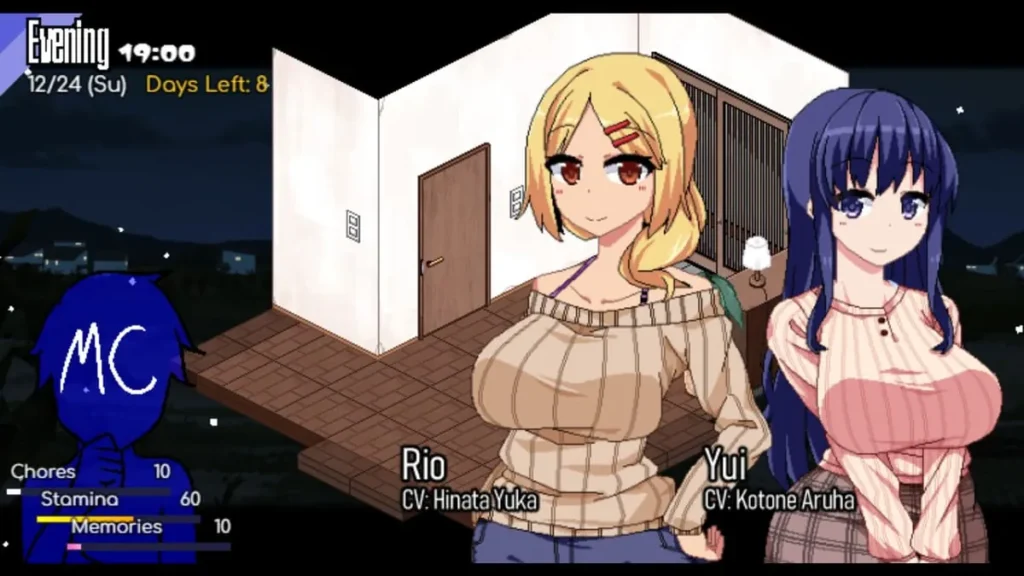
- Meet Everyone and Remember Names: In your first hour, you’ll likely be introduced to the core cast. Pay attention. Jot down names if you have to. Early interactions, even small greetings, can plant seeds for later developments.
- Identify Early Progression Goals: What’s the simple, repeatable action for earning money? Is it a part-time job at the cafe? Where is the library or study spot to raise your academic skill? Lock down one source of income and one skill-grinding location early.
- Check for Daily Time Mechanics: Does the game operate on a fixed schedule (Morning, Afternoon, Evening)? If so, plan your first full day. Maybe use the morning for a skill, the afternoon to meet a character, and the evening for your job.
- Perform a Simple “Side Task”: Many games hide early, easy achievements or small rewards in simple exploration. Try speaking to a minor NPC twice, examining a bookshelf in your room, or visiting a location not immediately pointed to by the story. This gets you in the mindset of active participation.
- Embrace the Repeatability: Your first playthrough is for discovery, not perfection. Make choices that feel right to you, not what a guide says. A key part of the Winter Memories experience is seeing how early choices branch out, leading to completely different scenes and endings on subsequent runs. Your “mistake” now might lead to your favorite memory later.
Following this first hour Winter Memories checklist transforms you from a passive reader into an active participant in the story’s world. You’ll have resources, understand the rules, and be ready to pursue the characters and endings that interest you most.
Now that you’re settled in and ready to engage with the world, the real question becomes: who will you spend this winter with? In our next chapter, we’ll dive deep into the heart of Winter Memories—the characters themselves. We’ll break down their personalities, the subtle hints they give early on, and how to navigate the beautiful complexity of their routes. Your journey is just beginning.
- Save your game in multiple slots right from the start.
- Open and familiarize yourself with every menu (Journal, Skills, Map).
- Read all tutorial pop-ups about game mechanics.
- Make a mental note of every character’s name and first impression.
- Find one reliable way to earn money (e.g., a part-time job).
- Find one location to boost a basic skill (e.g., the library).
- Understand the daily time/phase system (if present).
- Explore one optional area or talk to one non-essential NPC.
Winter Memories offers layered systems—character routes, progression mechanics, and collectible unlocks—that reward planning and repeat playthroughs. By configuring settings correctly from the start, learning route triggers, managing items and skills, and using community resources wisely, players can reduce grind and focus on the parts of the game they enjoy most. Try the step-by-step tips in this guide during your next run, save often, and consider engaging with the community for tricky unlocks and respectful discussion.